For expert insight into Visual Studio 2008.
Saturday, March 29, 2008
Tuesday, March 25, 2008
.Net Working with Xml
Xml is a World Wide Web Consortium Initiative for creating custom tags. It is based on text file.
Xml can be used as multiplatform data exchange format.
Types of XML Documents
1. Tag Based
In this Xml Document I have defined tags like Shalvin and Specialization.
Tag based xml is a better format than attribute based, but takes up more space.
2. Attribute based XML
Here ID and CategoryName are defined as attributes to Category.
3. Hybrid Xml
In a hybrid xml you will see elements of both tag and attribute. Hybrid xml is well suited for representing hierarchical data.
ReadXml, WriteXml and WriteXmlSchema methods
In the following example we are reading the contents of an XML document into a dataset and showing the contents in a DataGrid.
The user can enter new values into the DataGrid and on pressing the Save button the new data will be persisited back into the previous XML document that mimicing the data entry scenario.
DataSet.WriteXml method can be used to extract the Schema (structure) of an XML docuement.
DataSet ds = new DataSet();
private void Form1_Load(object sender, EventArgs e)
{
ds.ReadXml("c:\\Framework.xml");
dataGrid1.DataSource = ds;
}
private void btnSave_Click(object sender, EventArgs e)
{
ds.WriteXml("c:\\Framework.xml");
MessageBox.Show("Xml saved successfully");
}
private void btnWriteXmlSchema_Click(object sender, EventArgs e)
{
ds.WriteXmlSchema("c:\\FrameworkSchema.xml");
}
DataAdapter DataSet DataSet.WriteXml Method
WriteXml method can be used to write the Data of an XML Document to a Xml File.
using System.Data.SqlClient;
SqlConnection cnn;
SqlDataAdapter da;
DataSet ds = new DataSet();
private void Form1_Load(object sender, EventArgs e)
{
cnn = new SqlConnection("Integrated security=sspi;Initial Catalog=NorthWind");
cnn.Open();
da = new SqlDataAdapter("SELECT CategoryId,categoryName,Description from Categories", cnn);
da.Fill(ds,"cat");
da = new SqlDataAdapter("SELECT ProductId,ProductName,UnitPrice from Products", cnn);
da.Fill(ds, "Prod");
}
private void btnWriteXml_Click(object sender, EventArgs e)
{
ds.WriteXml(@"e:\\Categories.xml");
}
XmlDocument Load Methods
XmlDocument is an in memory tree representation of an XML.
using System.Xml;
XmlDocument xd = new XmlDocument();
private void Form1_Load(object sender, EventArgs e)
{
XmlDocument xd = new XmlDocument();
xd.Load(@"c:\\Framework.xml");
textBox1.Text = xd.InnerText;
}
XmlTextWriter
XmlTextWriter is a writer that produce streams of file containing xml data.
using System.Xml;
XmlTextWriter xtw;
protected void Page_Load(object sender, EventArgs e)
{
xtw = new XmlTextWriter("c:\\Contacts.xml", null);
xtw.WriteStartElement("Contacts");
xtw.WriteStartElement("Contact");
xtw.WriteStartElement("Name");
xtw.WriteString("Shalvin");
xtw.WriteEndElement();
xtw.WriteStartElement("Location");
xtw.WriteString("Kochi");
xtw.WriteEndElement();
xtw.WriteEndElement();
xtw.WriteEndElement();
xtw.Close();
}
XmlTextReader
In this example we will be reading the content of an xml file and populate the Title of form accordingly.
using System.Xml;
XmlTextReader xmlr = new XmlTextReader("f:\\Settings.xml");
private void Form1_Load(object sender, EventArgs e)
{
while(xmlr.Read())
switch (xmlr.Site)
{
case "Name":
this.Text = xmlr.ReadString();
break;
}
Xslt
Xslt is to XML what CSS is to Html. Xslt can be used to give a good look and feel for xml.
Extracting XML from SQL Server tables
It is possible to extract the contents of a Sql SELECT as XML.
for xml auto
The following SQL statements will produce an attribute based xml document.
select CategoryId, CategoryName, description from Categories for xml auto
for xml auto, elements
The following SQL statements will produce an attribute tag xml document.
select CategoryId, CategoryName, description from Categories for xml auto, elements
Related Blog
DataTable DataColumn and DataRow (Asp.Net)
Linq to Xml (Code Snippets)
DataTable DataColumn and DataRow in .Net
DataSet is an offline disconnected Data Store.
DataSet is a collection of DataTables.
A DataTable Contains DataRow and DataColumns.
The following code illustrating creating DataTable, DataRow and DataColumn. This approached can be used for creating a temporary storage of structured data.
using System.Data;
DataTable dt = new DataTable("Purchase");
DataColumn dc;
DataRow dr;
protected void Page_Load(object sender, EventArgs e)
{
dc = new DataColumn("ProductName");
//Adding the column to the Columns colluction of DataTable
dt.Columns.Add(dc);
dc = new DataColumn("Price");
//Adding the column to the Columns colluction of DataTable
dt.Columns.Add(dc);
//Adding a new row to the table
dr = dt.NewRow();
dr["ProductName"] = "Microsoft Mouse";
dr["Price"] = 400;
dt.Rows.Add(dr);
grvPurchase.DataSource = dt;
DataBind();
}
Figure 1
VB .Net
Imports System.Data
Partial Class _Default
Inherits System.Web.UI.Page
Dim dt As New DataTable("Purchase")
Dim dc As DataColumn
Dim dr As DataRow
Protected Sub Page_Load(ByVal sender As Object, ByVal e As System.EventArgs) Handles Me.Load
dc = New DataColumn("ProductName")
'Adding the column to the Columns colluction of DataTable
dt.Columns.Add(dc)
dc = New DataColumn("Price")
'Adding the column to the Columns colluction of DataTable
dt.Columns.Add(dc)
'Adding a new row to the table
dr = dt.NewRow()
dr("ProductName") = "Microsoft Mouse"
dr("Price") = 400
dt.Rows.Add(dr)
grvPurchase.DataSource = dt
DataBind()
End Sub
End Class
Windows Forms
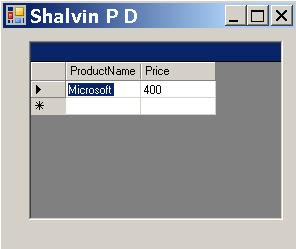
DataBind() method is not required in the case with Windows Forms. Here I am using DataGrid and not DataGridView. The code work perfectly fine with DataGridView.
Figure 2
DataSet and DataGrid
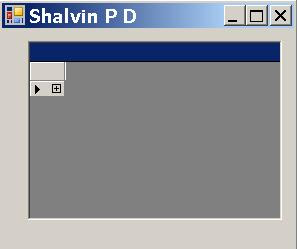
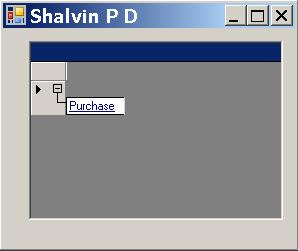
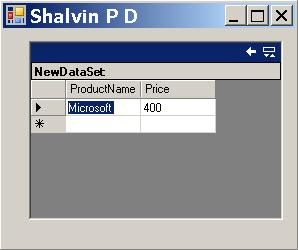
DataGrid is better suited to display the relationship between DataSet and DataTable.
DataSet ds = new DataSet();
DataTable dt = new DataTable("Purchase");
DataColumn dc;
DataRow dr;
private void Form1_Load(object sender, EventArgs e)
{
dc = new DataColumn("ProductName");
//Adding the column to the Columns colluction of DataTable
dt.Columns.Add(dc);
dc = new DataColumn("Price");
//Adding the column to the Columns colluction of DataTable
dt.Columns.Add(dc);
//Adding a new row to the table
dr = dt.NewRow();
dr["ProductName"] = "Microsoft Mouse";
dr["Price"] = 400;
dt.Rows.Add(dr);
ds.Tables.Add(dt);
dataGrid1.DataSource = ds;
}
Figure 3
Figure 4
Figure 5
Specifying the DataTable of DataSet in DataGridView
ds.Tables.Add(dt);
dataGridView1.DataSource = ds.Tables["Purchase"];
Now the result will be similar to that of Figure 2.
Building Invoice Type Application
By Invoice Type Application I mean those applications used in invoicing module wherein as the user submits temporary data it won't be committed to database. Instead it would be stored temporarily and calculations like totaling done on the local data.
In the example below as the user enters the product details its sub total will be displayed below the grid.
Here I am using the simplified code for creating DataColums and DataRows.
DataTable dt = new DataTable("Purchase");
private void Form1_Load(object sender, EventArgs e)
{
dt.Columns.Add("ProductName", typeof(string ));
dt.Columns.Add("Price", typeof(int));
}
private void btnAdd_Click(object sender, EventArgs e)
{
int intTotal = 0;
dt.Rows.Add(txtProductName.Text, txtUnitPrice.Text );
ShowData();
foreach (DataRow dr in dt.Rows)
intTotal += Int32.Parse(dr["Price"].ToString());
lblTotal.Text = intTotal.ToString();
}
private void ShowData()
{
dataGridView1.DataSource = dt;
txtProductName.Text = "";
txtUnitPrice.Text = "";
txtProductName.Focus();
}
Related Blogs
Filling Windows Forms ListView with DataTable
Xml with .Net
Monday, March 24, 2008
SqlDataReader and Asp.Net ListBox
SqlClient namespace contains classes required for interacting with Sql Server 7 and above.
SqlConnection class is used for establishing a live session between front end and back end. In this example we are using Integrated Security, ie. using the windows credential for connecting to Sql Server.
SqlDataReader is a read-only forward only recordset.
In the SqlCommand's constructor we are passing the Sql Command. Inorder to create an SqlDataReder the ExecuteReader method of SqlCommand have to be used.
SqlDataReader Read() Method
After creating the SqlDataReader we use the Read method for iterating throug the SqlDataReader and folling the ListBox.
using System.Data.SqlClient;
SqlCommand cmd;
SqlDataReader dr;
private void Form1_Load(object sender, EventArgs e)
{
cnn = new SqlConnection("Integrated Security=sspi;Initial Catalog=Northwind");
cnn.Open();
cmd = new SqlCommand("select * from Categories", cnn);
dr = cmd.ExecuteReader();
while (dr.Read())
lstCategories.Items.Add(dr["CategoryName"].ToString());
}
ListBox DataSouce and DataTextField Properties
Instead of using the Read() method of SqlDataReader and invoking the Items.Add() for filling the ListBox we can use DataSource and DataTextField Properties of ListBox for filling a ListBox which is a better approach.
SqlConnection cnn;
SqlCommand cmd;
SqlDataReader dr;
protected void Page_Load(object sender, EventArgs e)
{
cnn = new SqlConnection("Integrated Security=sspi;Initial Catalog=Northwind");
cnn.Open();
cmd = new SqlCommand("select * from Categories", cnn);
dr = cmd.ExecuteReader();
lstCategories.DataSource = dr;
lstCategories.DataTextField = "CategoryName";
DataBind();
}
Related Blogs
DataTable DataColumn and DataRow (Asp.Net)
Creating and Consuming Class Library in C#, Object Initializer
Knowledge of working with the class is essential in working with technologies like Web Service, Windows Communication Framework (MCF), Creating ASP .Net Web Controls, Model View Controller (MVC), etc.
I have already demonstrated creating class modules in C# WPF Creating Class with Constructors.
In that blog I creating the class by adding a class to the existing project. The drawback with that model is you can't use the class library outside the project.
Creating Class Library
In Visual Studio Select Class Library Project.
Visual Studio will create a project with a class called Class1. Better rename the class to Bank.
In this exercise we will be creating a Bank Class with one property called Balance and two methods Deposit and Withdraw.
namespace ShalvinBankLib
{
public class Bank
{
private int miBalance;
public int Balance
{
get
{
return miBalance;
}
set { miBalance = value; }
}
public void Deposit(int Amount)
{
Balance = Balance + Amount;
}
public void Withdraw(int Amount)
{
Balance = Balance - Amount;
}
}
}
Instead of running the project you should build the project by going to Build, Build Solution (F6).
It creates a dll with the name of the project.
C# 3.0 Automatic properties
Writing getter setter and private memory variable for creating a property seem over kill.
private int miBalance;
public int Balance
{
get
{
return miBalance;
}
Instead in with C# 3.0 the programming have to just create a code like the following for creating a property :
public int Balance
{
get;
set;
}
This new language feature incurs no performance set backs because behind the scene it is creating getter setter and private memory variable for you.
Automatic property can be easily created by typing prop tab tab.
Consuming Class Library
Create a Windows Forms Application. You have add a reference to the dll by going to Project, Add Reference.
Select Browse tab in the dialog.
Navigate to the bin directory inside Release folder of the project and select the dll.
Now you can use the dll in your project just like you use the .Net class libraries.
Create a visual interface as shown below.
using ShalvinBankLib;
Bank ShalvinBank;
private void Form1_Load(object sender, EventArgs e)
{
ShalvinBank = new Bank();
}
private void ShowBalance()
{
lblCurBal.Text = ShalvinBank.Balance();
txtAmount.Text = "";
txtAmount.Focus();
}
private void btnDeposit_Click(object sender, EventArgs e)
{
ShalvinBank.Deposit(Int32.Parse(txtAmount.Text);
ShowBalance();
}
private void btnDeposit_Click(object sender, EventArgs e)
{
ShalvinBank.Withdraw(Int32.Parse(txtAmount.Text);
ShowBalance();
}
}
C# 3.0 Object Initializer
With C# 3.0 it is possible to initialize a class with
Bank ShalvinBank = new Bank { Balance = 5000 };
MessageBox.Show(ShalvinBank.Balance.ToString());
Thus the class can be initialized event without creating a constructor.
Additional Note on Class Libraries
It is very much possible to have forms inside class libraries. This is very useful in ERP type applications where new modules can be easily plugged into existing application simply be setting a reference to the class library and invoking the form from the parent application.
Form Visual Interface Code
private void InitializeComponent()
{
this.btnWithdraw = new System.Windows.Forms.Button();
this.btnDeposit = new System.Windows.Forms.Button();
this.txtAmount = new System.Windows.Forms.TextBox();
this.lblCurBal = new System.Windows.Forms.Label();
this.Label2 = new System.Windows.Forms.Label();
this.Label1 = new System.Windows.Forms.Label();
this.SuspendLayout();
//
// btnWithdraw
//
this.btnWithdraw.Location = new System.Drawing.Point(128, 137);
this.btnWithdraw.Name = "btnWithdraw";
this.btnWithdraw.Size = new System.Drawing.Size(75, 23);
this.btnWithdraw.TabIndex = 11;
this.btnWithdraw.Text = "Withdraw";
this.btnWithdraw.UseVisualStyleBackColor = true;
//
// btnDeposit
//
this.btnDeposit.Location = new System.Drawing.Point(36, 137);
this.btnDeposit.Name = "btnDeposit";
this.btnDeposit.Size = new System.Drawing.Size(75, 23);
this.btnDeposit.TabIndex = 10;
this.btnDeposit.Text = "Deposit";
this.btnDeposit.UseVisualStyleBackColor = true;
//
// txtAmount
//
this.txtAmount.Location = new System.Drawing.Point(116, 81);
this.txtAmount.Name = "txtAmount";
this.txtAmount.Size = new System.Drawing.Size(100, 20);
this.txtAmount.TabIndex = 9;
//
// lblCurBal
//
this.lblCurBal.BorderStyle = System.Windows.Forms.BorderStyle.Fixed3D;
this.lblCurBal.Location = new System.Drawing.Point(116, 34);
this.lblCurBal.Name = "lblCurBal";
this.lblCurBal.Size = new System.Drawing.Size(87, 23);
this.lblCurBal.TabIndex = 8;
//
// Label2
//
this.Label2.AutoSize = true;
this.Label2.Location = new System.Drawing.Point(30, 44);
this.Label2.Name = "Label2";
this.Label2.Size = new System.Drawing.Size(46, 13);
this.Label2.TabIndex = 7;
this.Label2.Text = "Balance";
//
// Label1
//
this.Label1.AutoSize = true;
this.Label1.Location = new System.Drawing.Point(33, 88);
this.Label1.Name = "Label1";
this.Label1.Size = new System.Drawing.Size(43, 13);
this.Label1.TabIndex = 6;
this.Label1.Text = "Amount";
//
// Form1
//
this.AutoScaleDimensions = new System.Drawing.SizeF(6F, 13F);
this.AutoScaleMode = System.Windows.Forms.AutoScaleMode.Font;
this.ClientSize = new System.Drawing.Size(292, 266);
this.Controls.Add(this.btnWithdraw);
this.Controls.Add(this.btnDeposit);
this.Controls.Add(this.txtAmount);
this.Controls.Add(this.lblCurBal);
this.Controls.Add(this.Label2);
this.Controls.Add(this.Label1);
this.Name = "Form1";
this.Text = "Shalvin P D";
this.Load += new System.EventHandler(this.Form1_Load);
this.ResumeLayout(false);
this.PerformLayout();
}
#endregion
internal System.Windows.Forms.Button btnWithdraw;
internal System.Windows.Forms.Button btnDeposit;
internal System.Windows.Forms.TextBox txtAmount;
internal System.Windows.Forms.Label lblCurBal;
internal System.Windows.Forms.Label Label2;
internal System.Windows.Forms.Label Label1;
Related Blogs
.Net Remoting Walkthrough
Sunday, March 16, 2008
Reflection in .Net
In this example we are going to create a simple Object Browser like what you see in Visual Studio .Net by going to View menu and selecting Object Browser. Reflection in .Net requires the System.Reflecion namespace. Using the Load method of Assembly we are loading the mscorlib.dll into the cureent AppDomain. GetTypes method of Assembly can be used to return all the types defined in a module. The value returned by GetTypes is assigned to an array of Type and Displaying the contents in a listBox.

using System.Reflection;

private void Form1_Load(object sender, EventArgs e)
{
Assembly loadAssembly = Assembly.Load("mscorlib.dll");
Type[] mytypes = loadAssembly.GetTypes();
foreach (Type types in mytypes)
listBox1.Items.Add(types);
}
using System;
using System.Reflection;

namespace AssemblyLoad
{
    class Program
    {
        static void Main(string[] args)
        {
            Assembly loadAssembly = Assembly.Load("mscorlib.dll");
            Type[] mytypes = loadAssembly.GetTypes();
            foreach (Type type in mytypes)
            {
                Console.WriteLine(type);
            }
            Console.ReadLine();
        }
    }
}

  using System.Reflection;

private void Form1_Load(object sender, EventArgs e) {
Type t = typeof(System.Windows.Forms.Form);

MethodInfo[] methods = t.GetMethods();
foreach (MethodInfo nextMethod in methods) {
treeView1.Nodes[0].Nodes.Add(nextMethod.ToString());
}

PropertyInfo[] properties = t.GetProperties();
foreach (PropertyInfo nextProperty in properties)
{
treeView1.Nodes[1].Nodes.Add(nextProperty.ToString());
}

EventInfo[] events = t.GetEvents();
foreach (EventInfo nextEvent in events)
{
treeView1.Nodes[2].Nodes.Add(nextEvent.ToString());
}
}
using System.Reflection;
using System.Runtime.CompilerServices;
using System.Runtime.InteropServices;


[assembly: AssemblyTitle("Shalvin's Assembly Inspector")]
[assembly: AssemblyDescription("Shalvin")]
[assembly: AssemblyConfiguration("")]
[assembly: AssemblyCompany("Shalvin Consulting")]
[assembly: AssemblyProduct("WindowsApplication1")]
[assembly: AssemblyCopyright("Copyright © shalvin@gmail.com")]
[assembly: AssemblyTrademark("")]
[assembly: AssemblyCulture("")]


[assembly: ComVisible(false)]


[assembly: Guid("afa9b674-416d-4e04-bf6a-805a99e98fe5")]


Here is the code to extract the Assembly Description.

using System.Reflection;
private void Form1_Load(object sender, EventArgs e)
{
Assembly a = Assembly.GetExecutingAssembly();
Type attrType = typeof(AssemblyDescriptionAttribute);
object[] attrs = a.GetCustomAttributes(attrType, false);
if (attrs.Length > 0)
{
AssemblyDescriptionAttribute desc = (AssemblyDescriptionAttribute)attrs[0];
listBox1.Items.Add(desc.Description);
}
Type attrComp = typeof(AssemblyCompanyAttribute);
object[] atCo = a.GetCustomAttributes(attrComp, false);
if (atCo.Length > 0)
{
AssemblyCompanyAttribute aca = (AssemblyCompanyAttribute)atCo[0];
listBox1.Items.Add(aca.Company);
}
}

using System.Reflection;

List<Type> lsTypes = new List<Type>();
private void Form1_Load(object sender, EventArgs e)
{
Assembly LoadAssembly = Assembly.Load("mscorlib.dll");
Type[] mytypes = LoadAssembly.GetTypes();
int i = 0;
foreach (Type types in mytypes)
{

treeView1.Nodes.Add(types.ToString());
MethodInfo[] mi = types.GetMethods();
treeView1.Nodes[i].Nodes.Add("Method");
foreach (MethodInfo m in mi)
{
treeView1.Nodes[i].Nodes[0].Nodes.Add(m.ToString());
}
PropertyInfo [] pi = types.GetProperties();
treeView1.Nodes[i].Nodes.Add("Properties");
foreach (PropertyInfo p in pi)
{
treeView1.Nodes[i].Nodes[1].Nodes.Add(p.ToString());
}

EventInfo[] ei = types.GetEvents();
treeView1.Nodes[i].Nodes.Add("Events");
foreach (EventInfo e1 in ei)
{
treeView1.Nodes[i].Nodes[2].Nodes.Add(e1.ToString());
}
i++;
}
Saturday, March 15, 2008
Wednesday, March 12, 2008
C# Language : The Console Way
Let us see working with C# using notepad and not Visual Studio. Along the way we will explore C# in detail.
It is better for beginner level user to go through this blog before reading my blog on Intermediate Language.
Open notepad and type the following code.
Hello World
class Hello{
 public static void Main()
 {
   System.Console.WriteLine("Shalvin");
 }
}
Save it as 1Hello.cs in say D:
Go to Microsoft Visual Studio 2008 from Program Menu, select Visual Studio Command prompt.
Change directory to D:. Type csc (C# Compiler followed by file name).
d:\>csc 1Hello.cs
The previous statement will create an exe called 1Hello.exe
You can invoke that by typing 1Hello in the command prompt.
d:\>1Hello
In the previous example we created an C# class. Inside the class we are creating a static Main method. We calling the WriteLine method of Console class. The Console class is within System Namespace.
Namespace is a collection of related classes.
Memory Variable and ReadLine
class ReadEg{
public static void Main() {
string strName;
System.Console.Write("Enter you name");
strName = System.Console.ReadLine();
System.Console.WriteLine("Hello " + strName);
}
}
In this example we are declaring a memory variable and ReadLine method for inputing value. Later on we are concatenating the Hello string along with the memory variable and writing it back to the console.
using Statement
using System;
class ReadEg{
public static void Main() {
string strName;
Console.Write("Enter you name");
strName = Console.ReadLine();
Console.WriteLine("Hello " + strName);
}
}
This example is similar to the previous example except that instead of repeating the System in front of Console.ReadLine and Console.WriteLine we are giving an using System; statement.
using statement is a short handing mechanism. That is if you specify an using statement then you need not repeat the namespace name again.
If
using System;
class IfEg
{
  public static void Main()
  {
    string strLang = "C";
    if(strLang == "C#")
    Console.WriteLine("C family of language");
  }
}
Else
using System;
class IfEg
{
  public static void Main()
  {
    string strLang = "Boo";

    if(strLang == "C#")
    Console.WriteLine("C family of language");
    else
    Console.WriteLine("I don't know");
  }
}
Functions
class FuncEg
{
public static void Main()
{
Hello();
}
public static void Hello()
{
System.Console.WriteLine("Hello");
}
}
Here I am creating a function which doesn't return any value. I am also making the function static so that it can be called from Main which is also static.
using System;
class FuncEg
{
public static void Main()
{
Hello();
}
public static void Hello()
{
for(int i = 0;i<10;i++)
Console.WriteLine("Hello " + i.ToString());
}
}
Date Type Conversions
using System;
class ReadEg{ public static void Main() {
int i, j, res;
Console.WriteLine("Enter first integer :");
i = Int32.Parse(Console.ReadLine());
Console.WriteLine("Enter second integer :");
j = Int32.Parse(Console.ReadLine());
res = i + j;
Console.WriteLine(res.ToString());
}
}
In this example I am using Int32.Parse for converting the input to Integer type and ToString() method for converting the result back to string.Exception Handling
using System;
class ReadEg
{
 public static void Main ()
 {
   try
   {
    int i, j, res;
    Console.WriteLine("Enter first value : ");
    i = Int32.Parse(Console.ReadLine());

    Console.WriteLine("Enter second value : ");
    j = Int32.Parse(Console.ReadLine());

    res = i / j;

    Console.WriteLine(res);
   }
   catch(Exception ex)
   {
    Console.WriteLine("Exception has occured");
   }
  }
}
SqlDataReader
using System;
using Sytem.Data.SqlClient;

class Program
{
static  SqlConnection cnn;
static SqlCommand cmd;
static SqlDataReader dr;
static void Main(string[] args)
{
    cnn = new SqlConnection(@"Data Source=.\sqlexpress;Initial Catalog=ContactManagement;Integrated Security=True;Pooling=False");
    cnn.Open();
    cmd = new SqlCommand("select * from ContactGroups", cnn);
    dr = cmd.ExecuteReader();
    while (dr.Read())
        Console.WriteLine("{0}  {1}", dr["GroupId"], dr["GroupName"]);

    Console.ReadLine();
}
}
Windows Forms : The Console Way
.Net Intermediate Language
Saturday, March 8, 2008
Web.config's appSettings section to avoid hard coded memory variable
appSettings section in web.config is a key value pair as show below.

Once you have created the appSetting you can access the value from code.
SqlConnection cnn;
SqlDataAdapter da;
DataSet ds = new DataSet();
protected void Page_Load(object sender, EventArgs e)
{
cnn = new SqlConnection(ConfigurationManager.AppSettings.Get("Cnn"));
cnn.Open();
da = new SqlDataAdapter("sp_helpdb", cnn);
da.Fill(ds, "Cat");
listBox1.DataSource = ds.Tables["Cat"];
listBox1.DataTextField = "name";
DataBind
}
AppSettings and WebSite Administration Tool
You need not manually edit the web.config file. There is a tool available form Asp .net 2.0 called Web Site Administration tool which can be used to edit the web.config file.
Go to WebSite menu and select Asp .Net Configuration.

Web Site Administration tool will appear. Select Application Configuration.

Select Create Application Settings.

In the page you can specify the Name and value by typing in the textboxes and the values will be updated in web.config file.

Windows Forms and App.Config file
Similar option is there for Windows Forms and WPF. Except that the file is App.Config instead of Web.Conif and you have set a reference to System.Configuration by selecting Project, Add Reference menu option.

shalvin.com
Thursday, March 6, 2008
Data Form Wizard in ASP.Net Part I
Having a Data Form Wizard will ease your development effort especially when it come to plain master forms like Customers, Clients, Employees, etc.
In this blog I will show you displaying tables and fields of a selected database.
This example makes use of web.config and appSettings for storing Connection String values. If you are not familiar working with AppSetting visit my blog Web.config's appSettings section to avoid hard coded memory variable or my video Asp.Net web.config file and appSettings.
I assume you are familiar with Wizard control and T-Sql Command like sp_helpdb, SELECT * FROM sysobjects and sp_help
In the second part of blog I will take up the issue of creating the actual form with the fields selected.
The code is pretty simple except the final part ie. filling the fields.
sp_help returns multiple resultsets. What we want is the coulmn_name which is present in the second resultset. That is why i am invoking the SqlDataReader's NextResult method.
using System.Data.SqlClient;
public partial class _Default : System.Web.UI.Page
{
SqlConnection cnn;
SqlDataAdapter da;
DataSet ds = new DataSet();
SqlCommand cmd;
SqlDataReader dr;
string strDb;
protected void Page_Load(object sender, EventArgs e)
{
cnn = new SqlConnection(ConfigurationManager.AppSettings.Get("Cnn"));
cnn.Open();
da = new SqlDataAdapter("sp_helpdb", cnn);
da.Fill(ds, "Db");
if (!IsPostBack)
{
ddlDb.DataSource = ds.Tables["Db"];
ddlDb.DataTextField = "name";
DataBind();
}
}
protected void ddlDb_SelectedIndexChanged(object sender, EventArgs e)
{
strDb = ddlDb.SelectedItem.ToString();
cnn = new SqlConnection("Integrated Security=sspi;Initial Catalog=" + strDb);
da = new SqlDataAdapter("SELECT * FROM sysobjects WHERE xtype = 'u'", cnn);
da.Fill(ds, "Tb");
ddlTable.DataSource = ds.Tables["Tb"];
ddlTable.DataTextField = "name";
DataBind();
}
Make sure that you set the AutoPostBack property of DropDownList to True.
protected void ddlTable_SelectedIndexChanged(object sender, EventArgs e)
{
cmd = new SqlCommand("sp_help " + ddlTable.SelectedItem.ToString(), cnn);
dr = cmd.ExecuteReader();
dr.NextResult();
while (dr.Read())
lstFields.Items.Add(dr["column_name"].ToString());
}
using System.Data.SqlClient; using System.IO;

Here is the equivalent code of the first part in Windows Forms. Here I am using TabControl.
using System.Data.SqlClient;
SqlConnection cnn;
SqlDataAdapter da;
DataSet ds = new DataSet();
SqlCommand cmd;
SqlDataReader dr;
string strDb;
private void Form1_Load(object sender, EventArgs e)
{
cnn = new SqlConnection("Integrated Security=sspi; Data Source= .\\sqlexpress; Initial Catalog="+comboBox1.Text);
cnn.Open();
da = new SqlDataAdapter("sp_helpdb", cnn);
da.Fill(ds, "Db");
comboBox1.DataSource = ds.Tables["Db"];
comboBox1.DisplayMember = "name";
}
private void btnNext_Click(object sender, EventArgs e)
{
tabControl1.SelectedIndex = 1;
strDb = comboBox1.Text.ToString();
cnn = new SqlConnection("Integrated Security=sspi;Data Source=.\\sqlexpress;Initial Catalog=" + strDb);
cnn.Open();
da = new SqlDataAdapter("SELECT * FROM sysobjects WHERE xtype = 'u'", cnn);
da.Fill(ds, "Tb");
ddlTable.DataSource = ds.Tables["Tb"];
ddlTable.DisplayMember = "name";
}
private void btnTblNext_Click(object sender, EventArgs e)
{
tabControl1.SelectedIndex = 2;
cmd = new SqlCommand("sp_help " + ddlTable.Text.ToString(), cnn);
dr = cmd.ExecuteReader();
dr.NextResult();
while (dr.Read())
lstFields.Items.Add(dr["column_name"].ToString());
dr.Close();
}


